
# 持久化Mongodb
# 一、安装Mongodb
1、安装
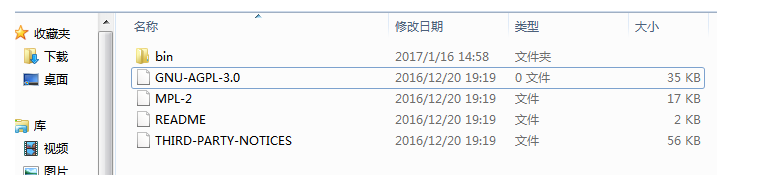
下载地址,选择zip版本的,解压后是下面这个样子
2、创建目录
在根目录下创建几个文件夹具体如下:数据库路径(data目录)、日志路径(logs目录)和日志文件(mongo.log文件)注意文件夹的前后对比: 创建配置文件mongo.conf,文件内容如下:
#数据库路径  注意此路径一定要改成你安装data文件夹的路径
dbpath=F:\mongodb\data
#日志输出文件路径  注意此路径一定要改成你安装mongo.log文件夹的路径
logpath=F:\mongodb\logs\mongo.log
#错误日志采用追加模式
logappend=true
#启用日志文件,默认启用
journal=true
#这个选项可以过滤掉一些无用的日志信息,若需要调试使用请设置为false
quiet=true
#端口号 默认为27017
port=27017
2
3
4
5
6
7
8
9
10
11
12
3、启动mongod服务
打开cmd命令行进入到mongodb的bin目录下,然后执行:./mongod --config "F:\mongodb\mongo.conf",会发现看不到什么变化
然后在浏览器中输入http://127.0.0.1:27017会出现下图,就证明成功了.
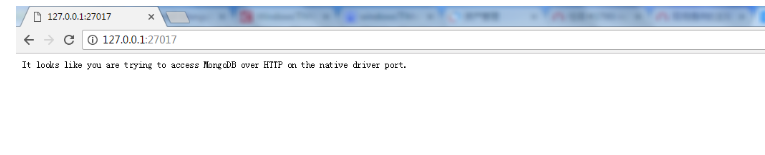
或者可以看看看data文件夹下有没有生成文件,还有mongo.log文件中有没有记录,如果有就是服务启动了,注意此时在“任务管理器”中是无法看到mongodb的服务的。
但是如果每次都进行上述操作就会很麻烦,可以进行如下操作,在cmd命令行中进入到mongodb的bin目录下输入如下两条命令:
./mongod --config "F:\mongodb\mongo.conf"  --install --serviceName "MongoDB";

net start MongoDB;
2
3
这样就可以在“任务管理器”中管理mongodb的开启和关闭了。如果启动失败,则需要以管理员身份运行命令。
net start MongoDB
net stop MongoDB
2
4、为mongo设置环境变量
连接mongo数据库还是需要到bin目录下执行mongo,这就需要添加环境变量了,将mongo的bin路径添加到环境变量之后,就可以在cmd的任意路径中通过mongo连接到mongo数据库。

5、下载可视化管理工具,studio3t
# 基本命令
// 查询所有数db据库
show dbs
// 切换/创建数据库,当创建一个集合(table)的时候会自动创建当前数据库
use test
// 插入一条数据
db.fruits.save({name:'苹果',price:5})
// 条件查询
db.fruits.find({price:5})
// 得到当前db的所有聚集集合
db.getCollectionNames()
// 查询
db.fruits.find()
2
3
4
5
6
7
8
9
10
11
12
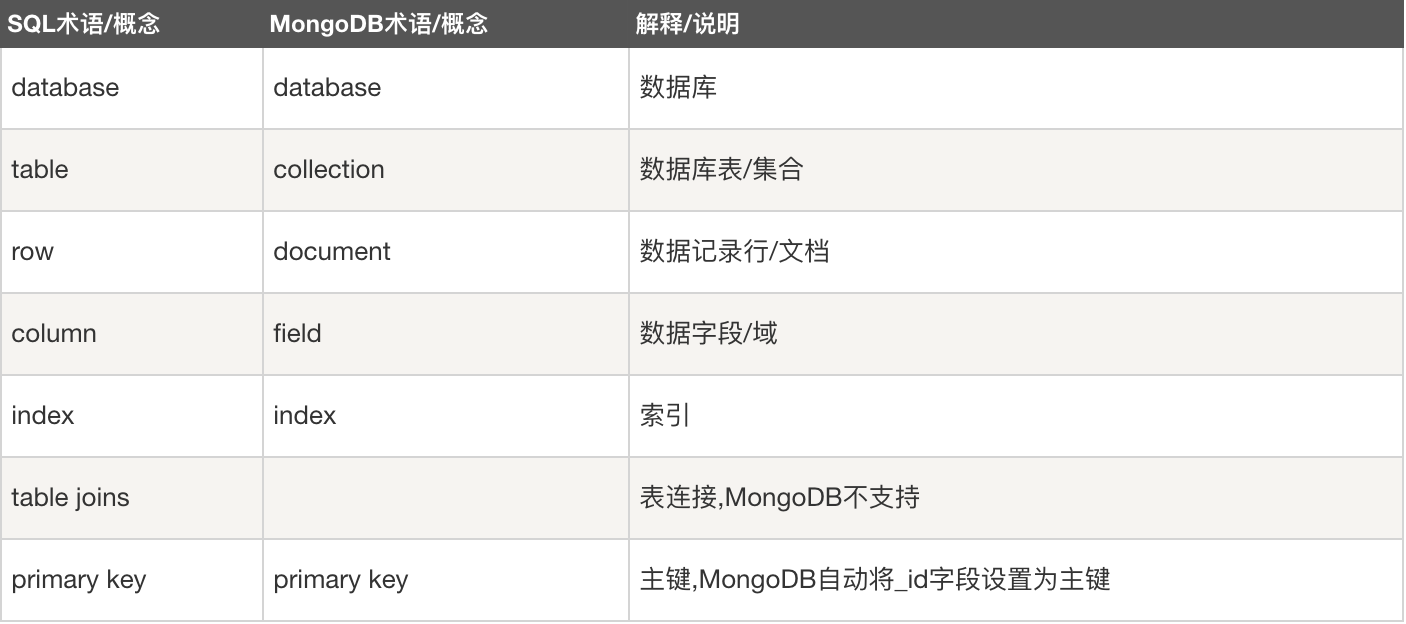
# Mongodb术语
# 二、使用原生驱动操作Mongodb
安装mongodb模块:npm install mongodb --save,最新的mongodb模块需要mongo服务版本比较高,如3.4版本
# 连接数据库
var mongoClient = require('mongodb').MongoClient;
var url = 'mongodb://127.0.0.1:27017'; // mongo服务地址
var dbName = 'student';  // 数据库名称
mongoClient.connect(url,function (err,client) {
    if (err) throw err;
    console.log('连接成功');
    var db = client.db(dbName);  // 连接到具体的数据库
})
2
3
4
5
6
7
8
# 查询数据
- 查询一条数据 findOne
const collection = db.collection('user');
collection.findOne({sn:1}).then((res)=>{
    callback(res);
});
2
3
4
结果示例:
{ _id: 5afa967370327d0229409491, sn: 0, name: 'ptbird0' }
- 查询多条或者全部数据 find
查找多个文档可以通过 toArray() 转换成数组,同时也支持 promise 操作。可以通过链式调用应用 skip 和 limit 方法。find 可指定查询条件,为{}则为查询全部。
const collection = db.collection('user');
collection.find({}).limit(3).toArray().then((res)=>{
    callback(res);
});
2
3
4
结果示例:
[ { _id: 5afa967370327d0229409491, sn: 0, name: 'ptbird0' },
{ _id: 5afa967370327d0229409493, sn: 2, name: 'ptbird2' },
{ _id: 5afa967370327d0229409494, sn: 3, name: 'ptbird3' } ]
2
3
# 插入数据
- 插入一条数据 insertOne
const collection = db.collection('user');
collection.insertOne({
    sn:1,
    name:'newptbird'
}).then((res)=>{
    callback(res);
});
2
3
4
5
6
7
结果中,可以通过 res.result 查看, ok = 1 表示成功,而 n 表示影响的行数。结果:{ ok: 1, n: 1 }
- 插入多条数据 insertMany
const collection = db.collection('user');
collection.insertMany([
    {sn:1,name:'ptbirdss'},
    {sn:2,name:'ptbirdss'},
    {sn:3,name:'ptbirdss'},
]).then((res)=>{
   callback(res);
});
2
3
4
5
6
7
8
插入结果: { ok: 1, n: 3 }
# 更新数据
- 更新一条数据 updateOne
const collection = db.collection('user');
collection.updateOne({sn:1},{$set:{name:'newptbird11111'}}).then((res)=>{
    callback(res);
}).catch((err)=>{console.log(err)});
2
3
4
更新结果: { ok: 1, n: 1 }
- 更新多条数据 updateMany
const collection = db.collection('user');
collection.updateMany({sn:1},{$set:{name:'newptbird asdasasdasdd'}}).then((res)=>{
    callback(res);
});
2
3
4
更新结果: { ok: 1, n: 3 }
# 删除数据
- 删除一条数据 deleteOne
const collection = db.collection('user');
collection.deleteOne({sn:1}).then((res)=>{
    callback(res);
});
2
3
4
删除结果:{ ok : 1 , n : 1}
- 删除多条数据 deleteMany
const collection = db.collection('user');
collection.deleteMany({sn:1}).then((res)=>{
    callback(res);
});
2
3
4
示例结果: { ok : 1 , n : 3}
# 其它
- 统计总记录数
const total = await col.find().count()
- 翻页(通过skip来实现)
const fruits = await col
    .find()
    .skip((page - 1) * 5)
    .limit(5)
    .toArray()
2
3
4
5
# 操作符
- 查询操作符:提供多种方式定位数据库数据
// 比较$eq,$gt,$gte,$in等
await col.find({price:{$gt:10}}).toArray()
// 逻辑$and,$not,$nor,$or
// price>10 或 price<5
await col.find({$or: [{price:{$gt:10}},{price:{$lt:5}}]})
// price不大于10且price不小于5
await col.find({$nor: [{price:{$gt:10}},{price:{$lt:5}}]})

// 元素$exists,$type
await col.insertOne({ name: "芒果", price: 20.0, stack:true })
await col.find({stack:{$exists:true}})
// 模拟$regex,$text,$expr
await col.find({name:{$regex:/芒/}})
await col.createIndex({name:'text'}) // 验证文本搜索需首先对字段加索引
await col.find({$text:{$search:'芒果'}}) // 按词搜索,单独字查询不出结果
// 数组$all,$elemMatch,$size
col.insertOne({..., tags: ["热带", "甜"]}) // 插入带标签数据
// $all:查询指定字段包含所有指定内容的文档
await col.find({ tags: {$all:['热带','甜'] } }
// $elemMatch: 指定字段数组中至少有一个元素满足所有查询规则
col.insertOne({hisPrice: [20,25,30]}); // 数据准备
col.find({ hisPrice: { $elemMatch: { $gt: 24,$lt:26 } } }) //历史价位有没有出现在24~26之间

// 地理空间$geoIntersects,$geoWithin,$near,$nearSphere
// 创建stations集合
const stations = db.collection("stations");
// 添加测试数据,执行一次即可
await stations.insertMany([
 { name: "天安门东", loc: [116.407851, 39.91408] },
 { name: "天安门西", loc: [116.398056, 39.913723] },
 { name: "王府井", loc: [116.417809, 39.91435] }
]);
await stations.createIndex({ loc: "2dsphere" });
r = await stations.find({
    loc: {
        $nearSphere: {
            $geometry: {
                type: "Point",
                coordinates: [116.403847, 39.915526]
            },
            $maxDistance: 1000
        }
    }
}).toArray();
console.log("天安门附近地铁站", r);
2
3
4
5
6
7
8
9
10
11
12
13
14
15
16
17
18
19
20
21
22
23
24
25
26
27
28
29
30
31
32
33
34
35
36
37
38
39
40
41
42
43
44
45
- 更新操作符:可以修改数据库数据或添加附加数据
// 字段相关:$set,$unset,$setOnInsert,$rename,$inc,$min,$max,$mul
// 更新多个字段
await fruitsColl.updateOne(
    { name: "芒果" },
    { $set: { price: 19.8, category: '热带水果' } },
);
// 更新内嵌字段
{ $set: { ..., area: {city: '三亚'} } }

// 数组相关:$,$[],$addToSet,$pull,$pop,$push,$pullAll
// $push用于新增
insertOne({tags: ['热带','甜']}) //添加tags数组字段
fruitsColl.updateMany({ name: "芒果" }, { $push: {tags: '上火'}})
// $pull,$pullAll用于删除符合条件项,$pop删除首项-1或尾项1
fruitsColl.updateMany({ name: "芒果" }, { $pop: {tags: 1}})
fruitsColl.updateMany({ name: "芒果" }, { $pop: {tags: 1}})
// $,$[]用于修改
fruitsColl.updateMany({ name: "芒果", tags: "甜" }, { $set: {"tags.$": "香甜"} })
// 修改器,常结合数组操作符使用:$each,$position,$slice,$sort
$push: { tags: { $each: ["上火", "真香"], $slice: -3 } }
2
3
4
5
6
7
8
9
10
11
12
13
14
15
16
17
18
19
20
- 聚合操作符:使用aggregate方法,使文档顺序通过管道阶段从而得到最终结果
// 聚合管道阶段:$group,$count,$sort,$skip,$limit,$project等
// 分页查询
r = await fruitsColl
.aggregate([{ $sort: { price: -1 } }, { $skip: 0 }, { $limit: 2 }])
.toArray();

// 投射:只选择name,price并排除_id
fruitsColl.aggregate([..., {$project:{name:1,price:1,_id:0}}]).toArray();

// 聚合管道操作符:$add,$avg,$sum等
// 按name字段分组,统计组内price总和
fruitsColl.aggregate([{ $group:{_id:"$name",total:{$sum:"$price"}}}]).toArray();
2
3
4
5
6
7
8
9
10
11
12
# 三、使用Mongoose操作Mongodb
安装:npm install mongoose -S
# 基本使用
// mongoose.js
const mongoose = require("mongoose");

// 1.连接
mongoose.connect("mongodb://localhost:27017/test",
    { useNewUrlParser: true, useUnifiedTopology: true }
);

const conn = mongoose.connection;
conn.on("error", () => console.error("连接数据库失败"));
conn.once("open", async () => {

    // 2.定义一个Schema - Table
    const Schema = mongoose.Schema({
        category: String,
        name: String
    });

    // 3.编译一个Model, 它对应数据库中复数、小写的Collection,(news)
    const Model = mongoose.model("new", Schema);
    try {
        // 4.创建,create返回Promise
        let r = await Model.create({
            category: "温带水果",
            name: "苹果",
            price: 5
        });
        console.log("插入数据:", r);

        // 5.查询,find返回Query,它实现了then和catch,可以当Promise使用
        // 如果需要返回Promise,调用其exec()
        r = await Model.find({ name: "苹果" });
        console.log("查询结果:", r);

        // 6.更新,updateOne返回Query
        r = await Model.updateOne({ name: "苹果" }, { $set: { name: '芒果' } });
        console.log("更新结果:", r);

        // 7.删除,deleteOne返回Query
        r = await Model.deleteOne({ name: "苹果" });
        console.log("删除结果:", r);
    } catch (error) {
        console.log(error);
    }
});
2
3
4
5
6
7
8
9
10
11
12
13
14
15
16
17
18
19
20
21
22
23
24
25
26
27
28
29
30
31
32
33
34
35
36
37
38
39
40
41
42
43
44
45
# Schema
Schema用来定义一个基础模型,而model是实例模型
- 字段定义
const blogSchema = mongoose.Schema({
    title: { type: String, required: [true, '标题为必填项'] }, // 定义校验规则
    author: String,
    body: String,
    comments: [{ body: String, date: Date }], // 定义对象数组
    date: { type: Date, default: Date.now }, // 指定默认值
    hidden: Boolean,
    meta: {
        // 定义对象
        votes: Number,
        favs: Number
    }
});
// 定义多个索引
blogSchema.index({ title:1, author: 1, date: -1 });

const BlogModel = mongoose.model("blog", blogSchema); // 生成一个模型
const blog = new BlogModel({
    title: "nodejs持久化",
    author: "jerry",
    body: "...."
});
const r = await blog.save();
console.log("新增blog", r);
2
3
4
5
6
7
8
9
10
11
12
13
14
15
16
17
18
19
20
21
22
23
24
- 可选字段类型:
String
Number
Date
Buffer
Boolean
Mixed
ObjectId
Array
2
3
4
5
6
7
8
避免创建索引警告:
mongoose.connect("mongodb://localhost:27017/test", {
    useCreateIndex: true
})
2
3
- 定义实例方法:抽象出常用方法便于复用
// 定义实例方法
blogSchema.methods.findByAuthor = function () {
   return this.model('blog').find({ author: this.author }).exec();
}
// 获得模型实例
const BlogModel = mongoose.model("blog", blogSchema);
const blog = new BlogModel({...});
// 调用实例方法
r = await blog.findByAuthor();
console.log('findByAuthor', r);
2
3
4
5
6
7
8
9
10
- 静态方法
blogSchema.statics.findByAuthor = function(author) {
    return this.model("blog").find({ author }).exec();
};
r=await BlogModel.findByAuthor('jerry')
console.log("findByAuthor", r);
2
3
4
5
- 虚拟属性
blogSchema.virtual("commentsCount").get(function() {
    return this.comments.length;
});
r = await BlogModel.findOne({author:'jerry'});
console.log("blog留言数:", r.commentsCount);
2
3
4
5